- Published on
Configuring Sentry's SAML2 Provider with Keycloak
- Authors
- Name
- Jay


When using Keycloak as your Identity Provider, you can configure SAML2 to authenticate Sentry. The official Sentry documentation provides detailed instructions on how to set up a custom SAML provider. You can find the URL formats for the Assertion Consumer Service (ACS), Single Logout Service (SLS), and metadata endpoints in the documentation, such as:
ACS: https://sentry.io/saml/acs/YOUR_ORG_SLUG/
SLS: https://sentry.io/saml/sls/YOUR_ORG_SLUG/
Metadata: https://sentry.io/saml/metadata/YOUR_ORG_SLUG/
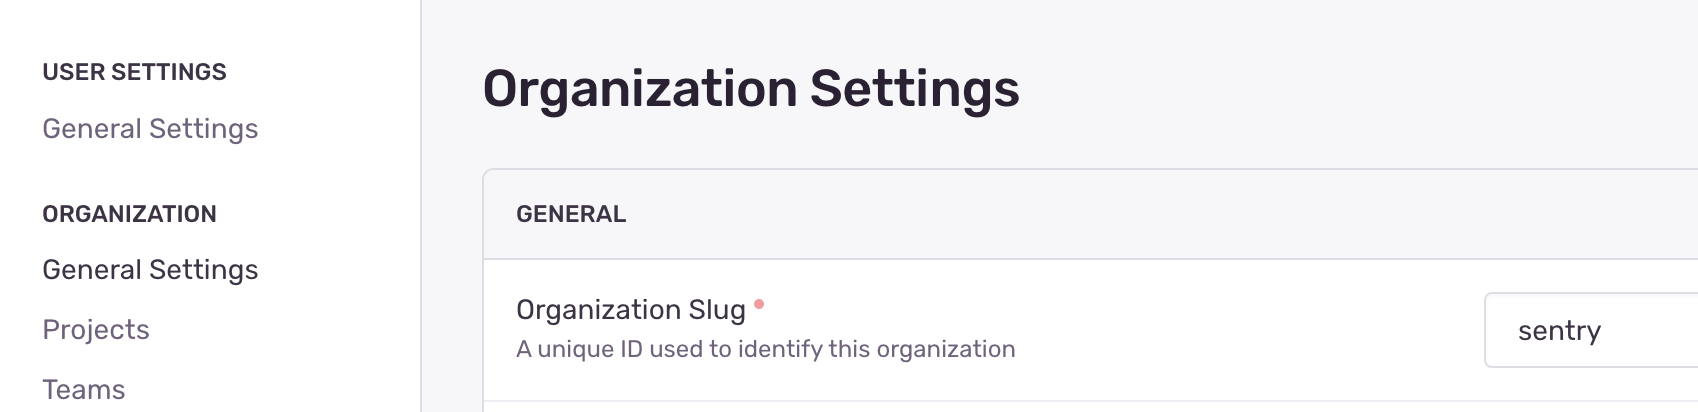
To fill in your organization slug, you can find the value on the Sentry Settings page.
Set Up Keylocak
Now, let’s create a client in Keycloak. Suppose your self-hosted Sentry URL is https://sentry.jayground8.com and your organization slug is sentry. Then, the client ID for the SAML2 client in Sentry should look like the following:
https://sentry.jayground8.com/saml/metadata/sentry/
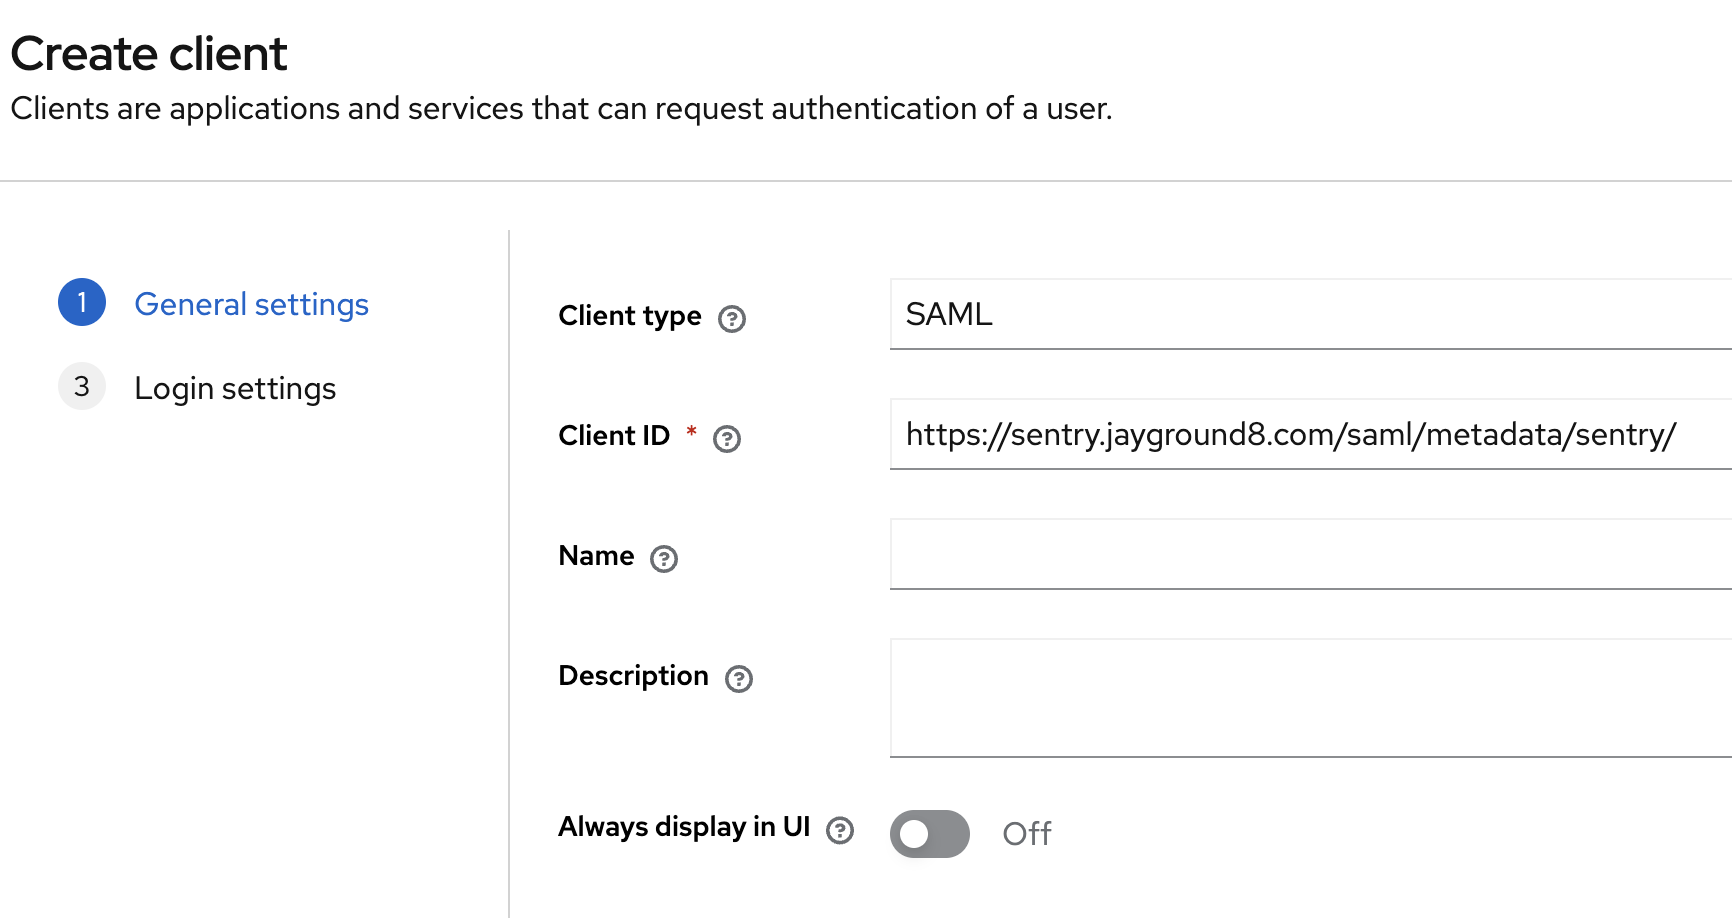
why? when Sentry redirect to Keycloak, it provide SAMLRequest Information with query params. <saml:Issuer> should match with Sentry Metadata(Entity ID). The client ID of SAML2 in Keycloak is used in <saml:Issuer>. You will receive an “invalid request” error from Keycloak if this value is not set correctly.
<samlp:AuthnRequest ...>
  <saml:Issuer xmlns:saml="urn:oasis:names:tc:SAML:2.0:assertion">
    https://sentry.jayground8.com/saml/metadata/sentry/
  </saml:Issuer>
  ...
</samlp:AuthnRequest>
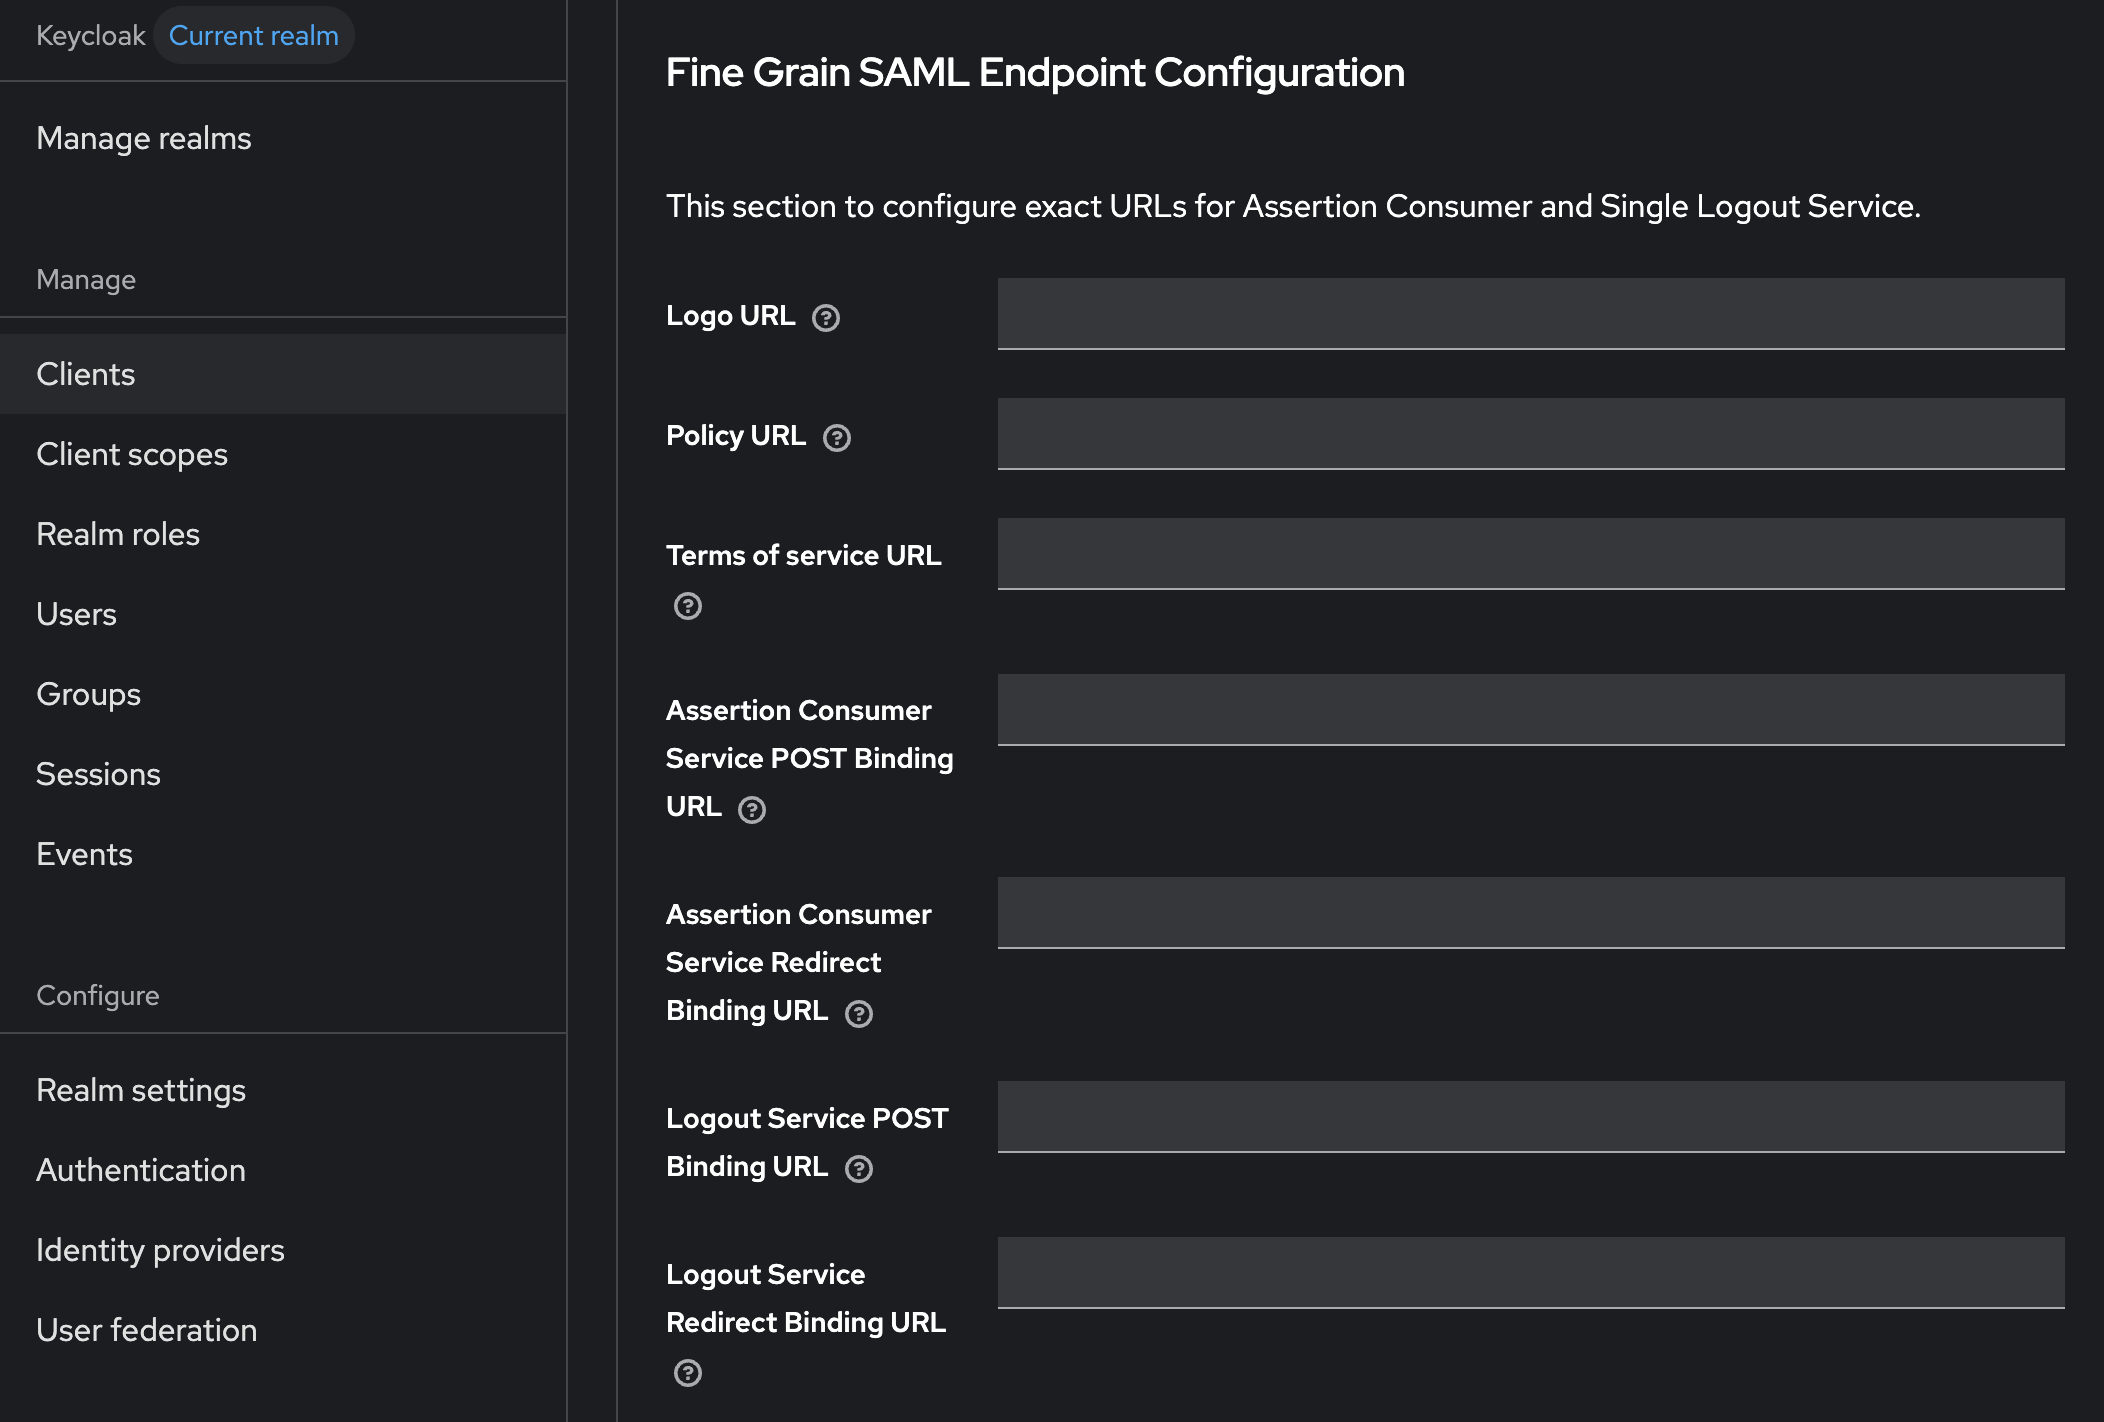
Some blogs suggest manually setting the ACS and SLS URLs in the Keycloak client’s advanced settings. However, this is not necessary, as the metadata (Entity ID) already provides those URLs.
Next, add the Valid Redirect URIs, and complete the client creation by clicking the Save button.
https://sentry.jayground8.com/*
Now, you need to configure a few more settings. First, create a Client Scope to pass the user’s email information to Sentry.
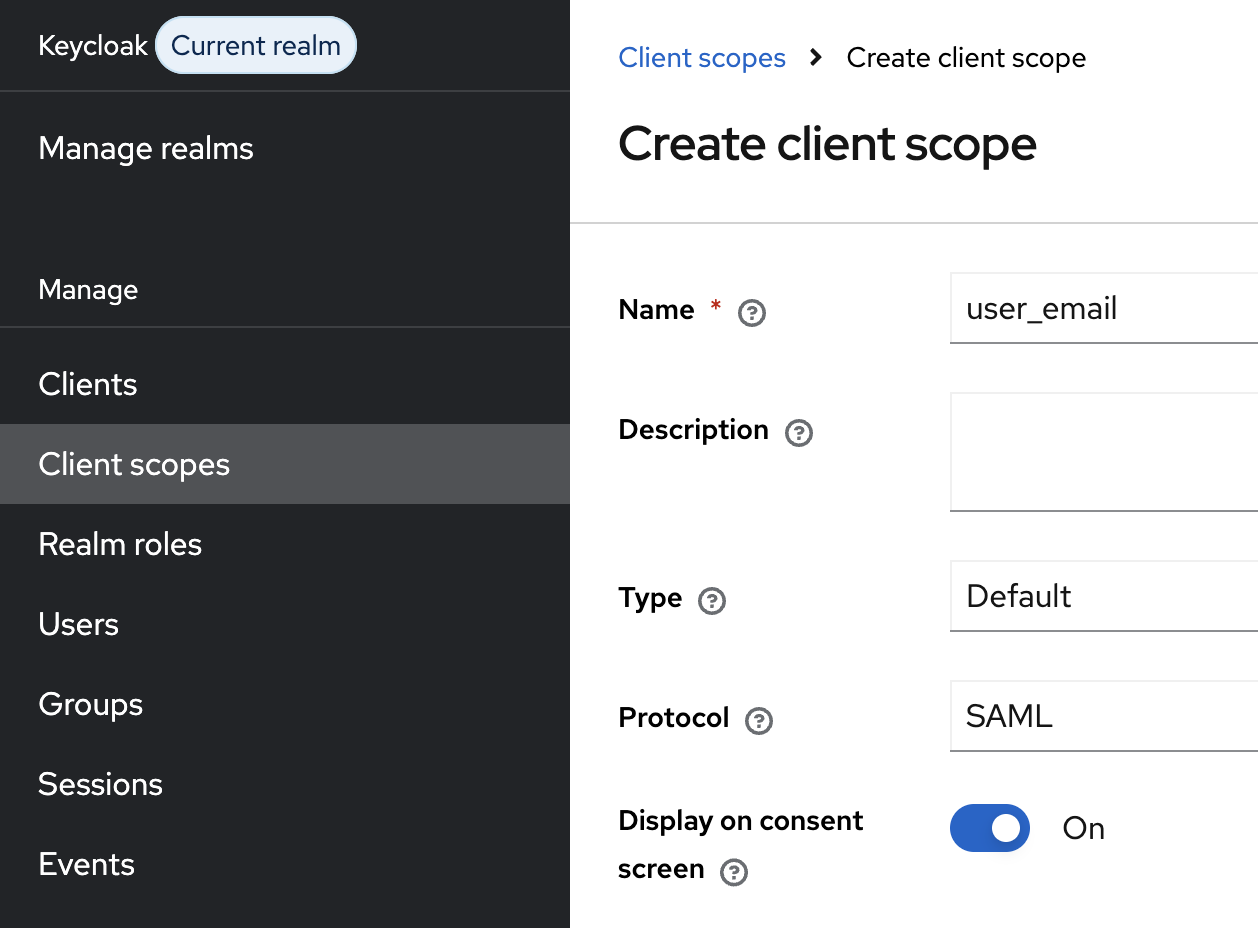
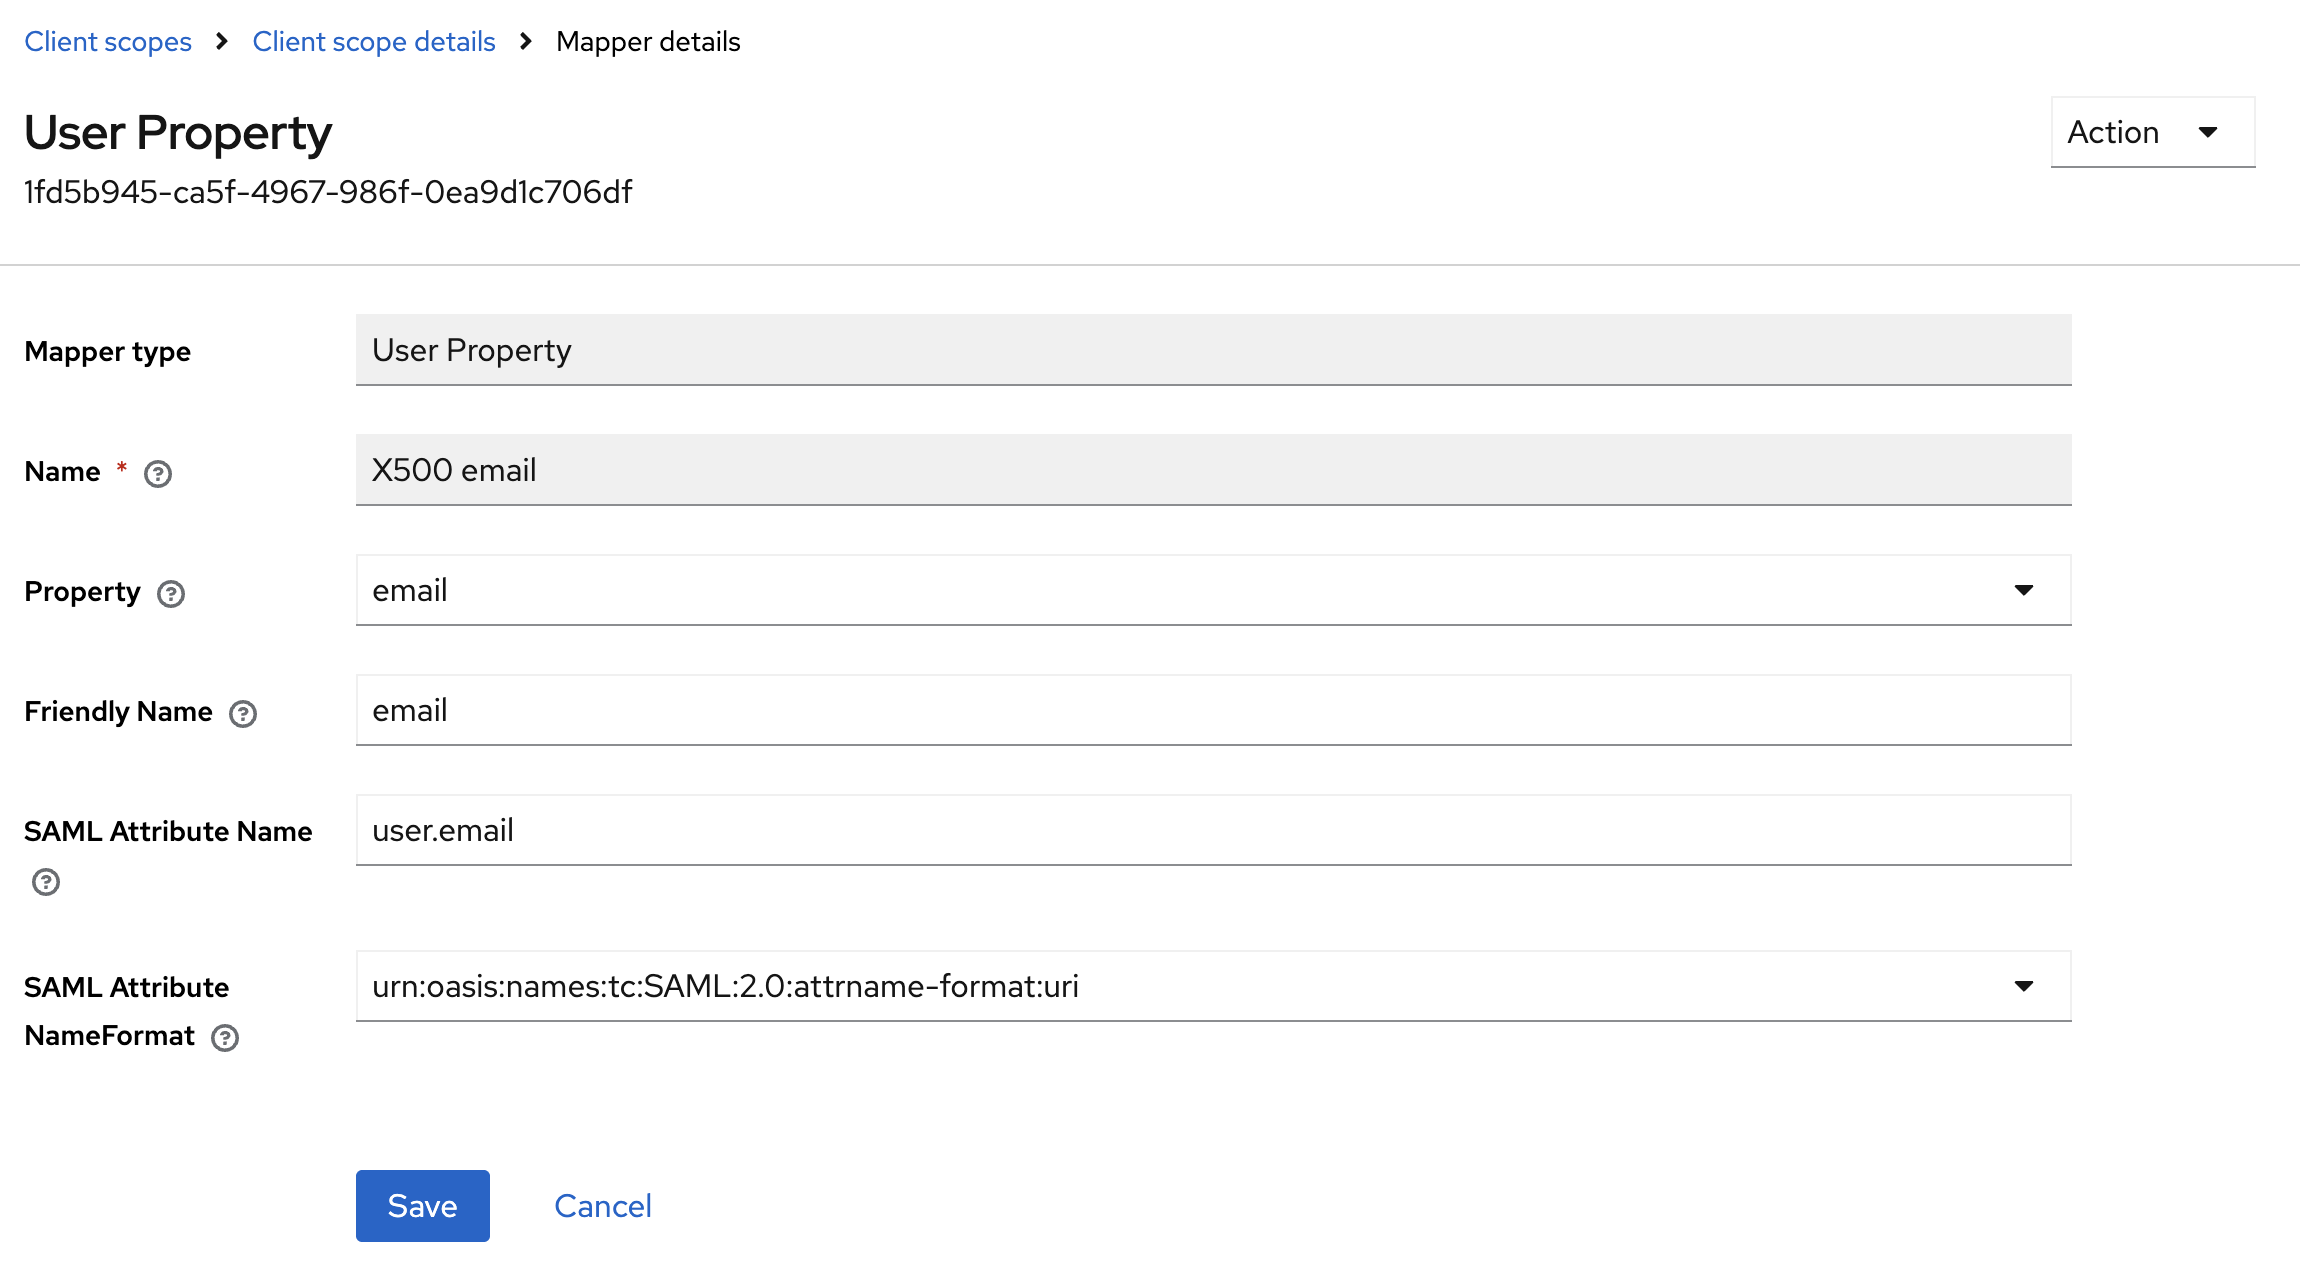
After creating the client scope, add predefined mappers to map the Keycloak user’s email to a SAML attribute.
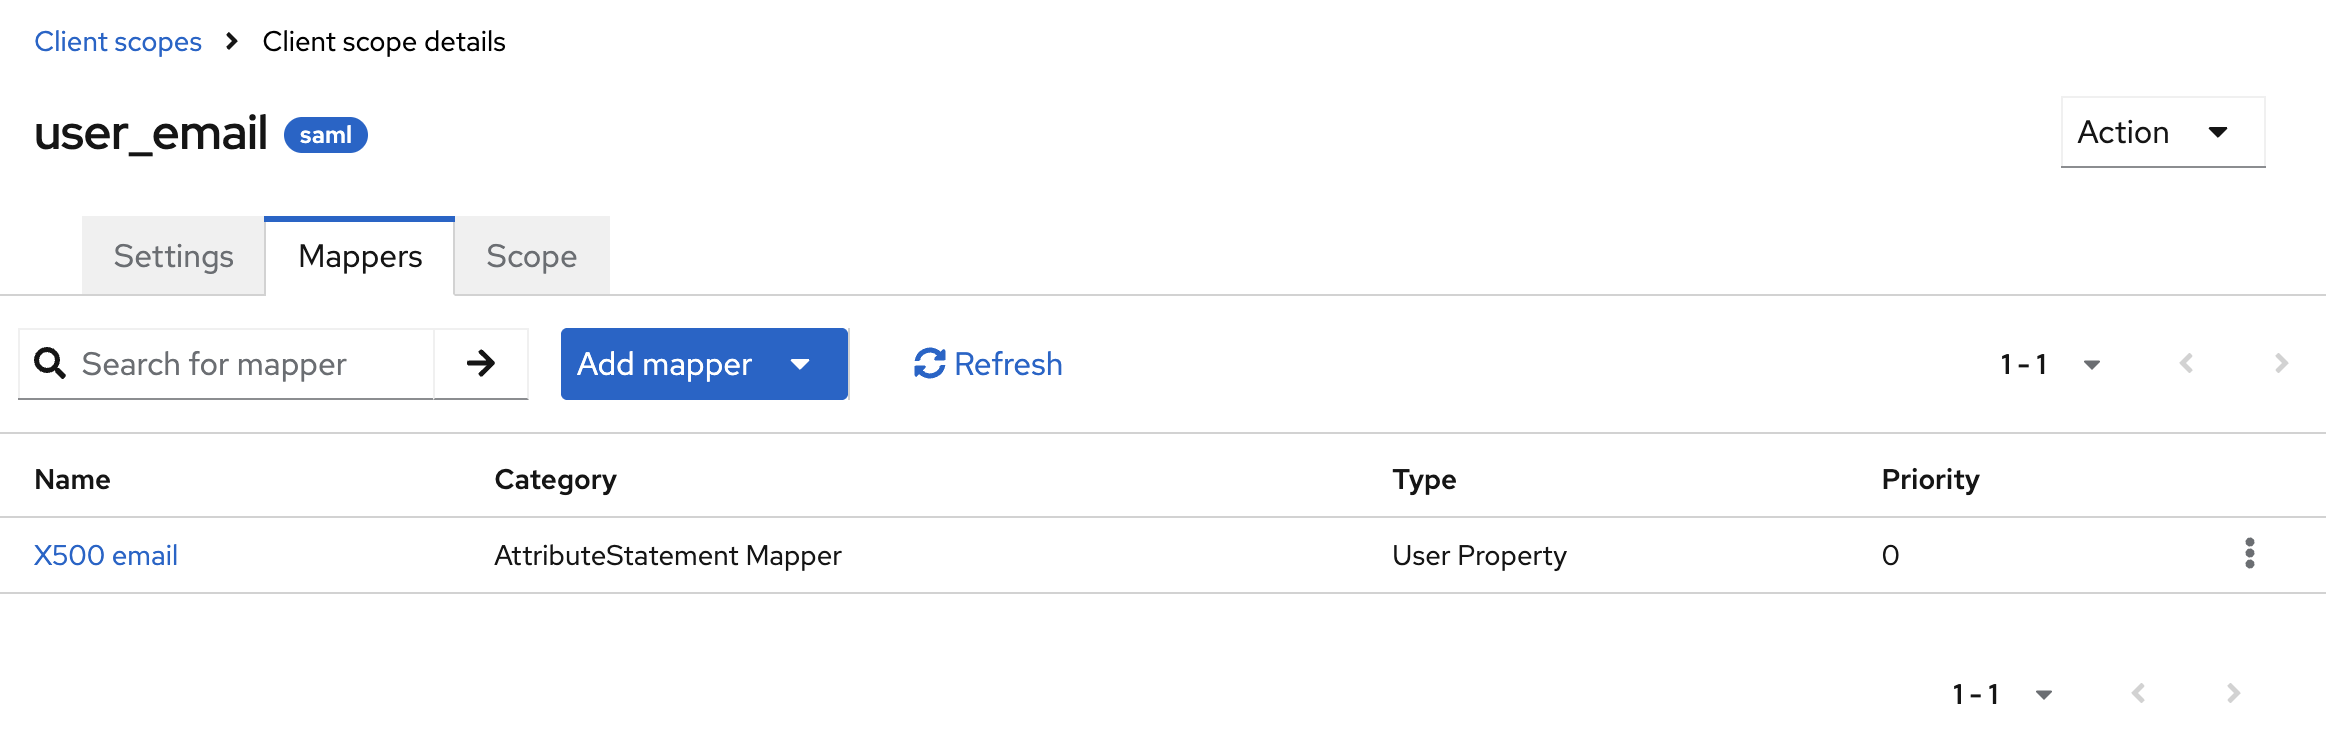
The SAML attribute name is important because you’ll later need to tell Sentry which SAML attributes to use for their user ID and email.
Since email will serve as the primary identifier, you also need to change the Name ID Format to email.

Finally, one last change: In SAML2, you can add an extra layer of security by requiring a client certificate when the Service Provider (Sentry) makes requests to the Identity Provider (Keycloak). However, since Sentry does not support this, make sure to disable that option.

Set Up Sentry
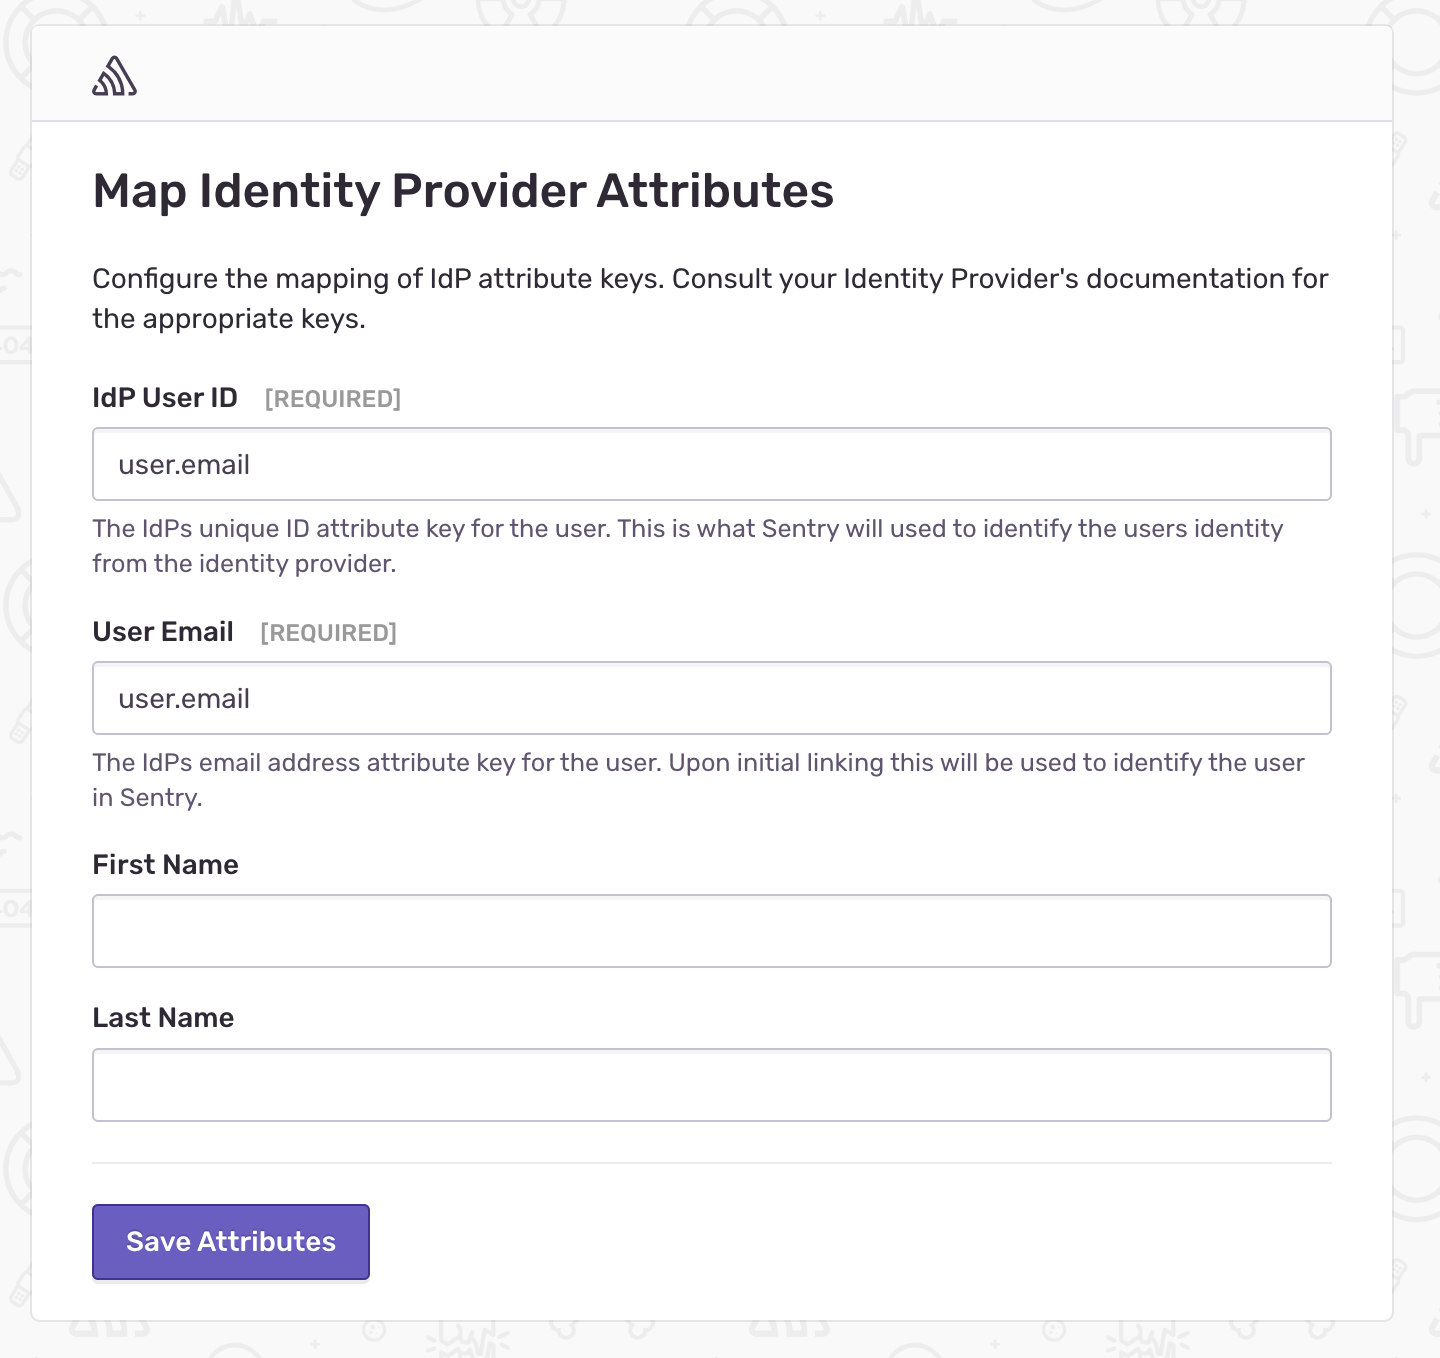
Now you’re ready to register a custom SAML2 provider in Sentry. You can simply provide Sentry with the metadata URL, like the example below. Just remember to replace the master realm with your own:
https://keycloak.jayground8.com/realms/master/protocol/saml/descriptor

Do you remember the attribute name you configured in Keycloak? You need to enter the same attribute names in Sentry so it can correctly map them to user ID and email.
If everything is configured correctly, Sentry will redirect you to Keycloak for authentication. Once authenticated, you should see that the SAML2 setup was successful in Sentry.
Limitation Of Sentry's SAML2 Authz
Unfortunately, Sentry does not support mapping user roles through SAML attributes. It only allows you to set a default role for users when they are first registered via SAML2.
When I configured Vault, ArgoCD, Grafana, Gitea, and the Kubernetes API server with Keycloak, all of them supported assigning roles or permissions based on the Keycloak user’s group—by mapping the SAML groups attribute to their internal authorization system. I was hoping Sentry would offer a similar capability, instead of requiring user roles or team memberships to be set manually.
Conclusion
I chose Keycloak to manage user authentication across all internal tools. Initially, I tried using Google Workspace groups with OIDC, but I ran into some limitations. Google’s OIDC implementation doesn’t include Google Workspace group claims by default. For example, to configure ArgoCD RBAC using Google groups, you need additional setup to allow ArgoCD’s Dex to retrieve group information after OIDC authentication.
Additionally, when configuring OIDC with the Kubernetes API server, you can’t bind roles directly to Google groups—unless you’re using GCP, which supports it natively. In contrast, Keycloak gives you full control over which claims are included in the token, making it much easier to implement group-based access control.
Keycloak also proved to be more flexible for managing users outside of Google Workspace, making it a better fit for our internal access control requirements.
This time, I integrated Sentry with Keycloak. There are several helpful blog posts available that make the process easy to follow. However, out of curiosity, I wanted to understand exactly what was happening behind the scenes—and clarify which steps are truly necessary.